Python の Web アプリケーションフレームワークである「 Django 」を利用してログイン画面を作成していきます。
プロジェクトの作成や MySQL との接続などについては過去の記事を参考にしてもらえればと思います。


環境
- Python : 3.5.1
- Django : 1.10.5
- MySQL : 5.5.42
ログイン画面を実装するためのアプリケーションを作成する
下記コマンドを実行して、ログイン画面を実装するアプリケーション( accounts )を作成します。
# プロジェクトのディレクトリ直下に移動した状態で実行する
$ python manage.py startapp accounts
すると、下記のディレクトリとファイルがプロジェクトディレクトリの直下に追加されます。
- accounts
- __init__.py
- admin.py
- apps.py
- migrations
- __init__.py
- models.py
- tests.py
- views.py
settings.py の INSTALLED_APPS に accounts アプリケーションを追加する
今のままでは Django は accounts アプリケーションを認識してくれないので、 setting.py の INSTALLED_APPS を編集し、 accounts アプリケーションを認識できるようにしてあげます。
INSTALLED_APPS = [
    ・・・
        ・・・
    'accounts',
]
テンプレートファイル格納ディレクトリを定義する
settings.py の TEMPLATES を編集し、テンプレートファイル格納ディレクトリを設定します。
TEMPLATES = [
    {
        ・・・
        'DIRS': [os.path.join(BASE_DIR, 'templates')],
        ・・・
    },
]
この際、テンプレートファイル格納ディレクトリも併せて作成しておきます。
# プロジェクトディレクトリ直下で実行
$ mkdir templates
accounts アプリケーションに AuthUser モデルを追加する
先ほど作成した accounts アプリケーションのmodels.pyに AuthUser モデルを実装します
# -*- coding: utf-8 -*-
from __future__ import unicode_literals
from django.utils.encoding import python_2_unicode_compatible
from django.db import models
from django.contrib.auth.models import AbstractBaseUser, BaseUserManager, PermissionsMixin

@python_2_unicode_compatible
class AuthUserManager(BaseUserManager):
    def create_user(self, username, email, password, last_name, first_name):
        """
        ユーザ作成

        :param username: ユーザID
        :param email: メールアドレス
        :param password: パスワード
        :param last_name: 苗字
        :param first_name: 名前
        :return: AuthUserオブジェクト
        """
        if not email:
            raise ValueError('Users must have an email')
        if not username:
            raise ValueError('Users must have an username')

        user = self.model(username=username,
                          email=email,
                          password=password,
                          last_name=last_name,
                          first_name=first_name)
        user.is_active = True
        user.set_password(password)
        user.save(using=self._db)
        return user

    def create_superuser(self, username, email, password, last_name, first_name):
        """
        スーパーユーザ作成

        :param username: ユーザID
        :param email: メールアドレス
        :param password: パスワード
        :param last_name: 苗字
        :param first_name: 名前
        :return: AuthUserオブジェクト
        """
        user = self.create_user(username=username,
                                email=email,
                                password=password,
                                last_name=last_name,
                                first_name=first_name)
        user.is_staff = True
        user.is_superuser = True
        user.save(using=self._db)
        return user

@python_2_unicode_compatible
class AuthUser(AbstractBaseUser, PermissionsMixin):
    """
    ユーザ情報を管理する
    """
    class Meta:
        verbose_name = 'ユーザ'
        verbose_name_plural = 'ユーザ'

    def get_short_name(self):
        """
        ユーザの苗字を取得する

        :return: 苗字
        """
        return self.last_name

    def get_full_name(self):
        """
        ユーザのフルネームを取得する

        :return: 苗字 + 名前
        """
        return self.last_name + self.first_name

    username = models.CharField(verbose_name='ユーザID',
                                unique=True,
                                max_length=30)
    last_name = models.CharField(verbose_name='苗字',
                                 max_length=30,
                                 default=None)
    first_name = models.CharField(verbose_name='名前',
                                  max_length=30,
                                  default=None)
    email = models.EmailField(verbose_name='メールアドレス',
                              null=True,
                              default=None)
    date_joined = models.DateTimeField(auto_now_add=True)
    is_active = models.BooleanField(verbose_name='有効フラグ',
                                    default=True)
    is_staff = models.BooleanField(verbose_name='管理サイトアクセス権限',
                                   default=False)

    USERNAME_FIELD = 'username'
    REQUIRED_FIELDS = ['email', 'last_name', 'first_name']
    objects = AuthUserManager()

    def __str__(self):
        return self.last_name + ' ' + self.first_name
この際、 Django の管理者サイトや manage.py で createsuperuser を実行しても問題ないように「 AuthUserManager 」も合わせて実装しておきます。
settings.py にログイン認証に必要な設定を追加する
プロジェクトディレクトリ直下にプロジェクトと同名のディレクトリがあると思いますが、その中にある「 settings.py 」にログイン認証に必要な設定を追加します。
LOGIN_ERROR_URL = '/accounts/login'
LOGIN_URL = '/accounts/login/'
LOGIN_REDIRECT_URL = '/accounts/index/'

AUTH_USER_MODEL = 'accounts.AuthUser'
ログイン画面用の html ファイルを作成する
ログイン画面として表示するhtmlファイルを templates ディレクトリ直下に作成します。
$ mkdir accounts
$ cd accounts
$ vim login.html
<!DOCTYPE html>
<html lang="ja">
<head>
<meta charset="UTF-8">
<title>Title</title>
</head>
<body>
<form action="/accounts/login/" method="post">
{% csrf_token %}
{% if next %}
<input type="hidden" name="next" value="{{ next }}" />
{% endif %}
<input type="text" name="username" placeholder="ユーザID">
<input type="password" name="password" placeholder="パスワード">
<button type="submit" name="login">ログイン</button>
</form>
</body>
</html>この際、ログイン成功後に遷移する画面も合わせて作成しておきます。
ログイン画面後の画面の作成
$ vim index.html<!DOCTYPE html>
<html lang="ja">
<head>
<meta charset="UTF-8">
<title>Title</title>
</head>
<body>
<h1>ログイン成功</h1>
</body>
</html>ログイン成功後に表示する画面の views.py の実装
ログイン成功後に accounts アプリケーションの index にアクセスしますが、今のままでは views.py を実装していないため、ログイン後に index にアクセスしようとするとエラーで落ちます。
そこで、 index を表示するためのコードを view.py に実装します。
# -*- coding: utf-8 -*-
from __future__ import unicode_literals
from django.utils.encoding import python_2_unicode_compatible
from django.views.generic import View
from django.shortcuts import render
from django.utils.decorators import method_decorator
from django.contrib.auth.decorators import login_required

@python_2_unicode_compatible
class Index(View):
    @method_decorator(login_required)
    def get(self, request):
        return render(request, 'accounts/index.html')
urls.py の編集
プロジェクトディレクトリ直下にプロジェクトと同名のディレクトリがあると思いますが、その中にある「 urls.py 」を編集します。
from django.conf.urls import url
from django.contrib import admin
from django.contrib.auth.views import login, logout_then_login
from accounts.views import Index

urlpatterns = [
    url(r'^admin/', admin.site.urls),
    url(r'^accounts/login/$', login, {'template_name': 'accounts/login.html'}, name='login'),
    url(r'^accounts/logout/$', logout_then_login, name='logout'),
    url(r'^accounts/index/$', Index.as_view(), name='account_index'),
]
マイグレーションを実行する
マイグレーションを実行し、実装した内容をDBに反映します。
もし、もうすでに makemigrations や migrate を実行している場合、マイグレーションを実行するとエラーとなることがあるので、特に問題なければ一度DBのテーブルを全て削除した状態でマイグレーションを実行します。
$ python manage.py makemigrations
Migrations for 'accounts':
  accounts/migrations/0001_initial.py:
    - Create model AuthUser

$ python manage.py migrate
Operations to perform:
  Apply all migrations: accounts, admin, auth, contenttypes, sessions
Running migrations:
  Applying contenttypes.0001_initial... OK
  Applying contenttypes.0002_remove_content_type_name... OK
  Applying auth.0001_initial... OK
  Applying auth.0002_alter_permission_name_max_length... OK
  Applying auth.0003_alter_user_email_max_length... OK
  Applying auth.0004_alter_user_username_opts... OK
  Applying auth.0005_alter_user_last_login_null... OK
  Applying auth.0006_require_contenttypes_0002... OK
  Applying auth.0007_alter_validators_add_error_messages... OK
  Applying auth.0008_alter_user_username_max_length... OK
  Applying accounts.0001_initial... OK
  Applying admin.0001_initial... OK
  Applying admin.0002_logentry_remove_auto_add... OK
  Applying sessions.0001_initial... OK
ログイン時に利用するログインユーザを作成する
manage.py を利用してコマンドラインからログインユーザを作成します。
$ python manage.py createsuperuser
ユーザID: testuser
メールアドレス: test@test.com
苗字: test
名前: user
Password:
Password (again):
Superuser created successfully.
これで「 testuser 」というユーザが作成されました。
では、実際にログイン画面にアクセスし、ログインできるか確認して見ます。
ログインできるか確認する
Django の開発サーバを起動します。
$ python manage.py runserver
Performing system checks...

System check identified no issues (0 silenced).
March 22, 2017 - 07:12:57
Django version 1.10.5, using settings 'sample.settings'
Starting development server at http://127.0.0.1:8000/
Quit the server with CONTROL-C.
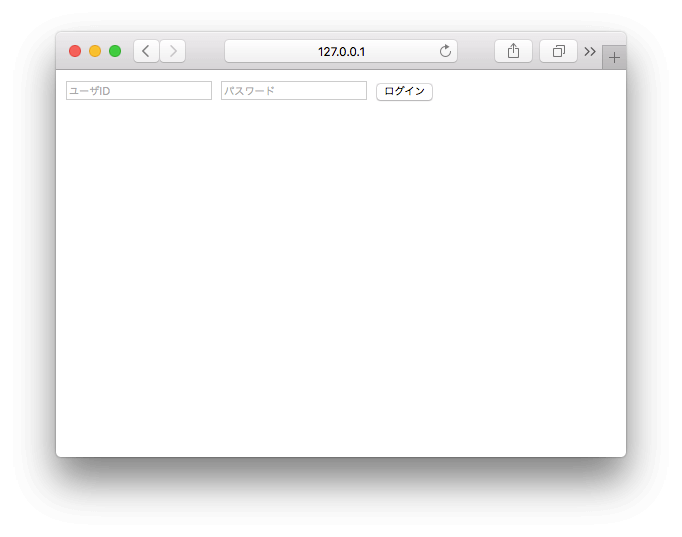
起動はうまくいったので、ブラウザからログイン画面にアクセスします。
ログイン画面

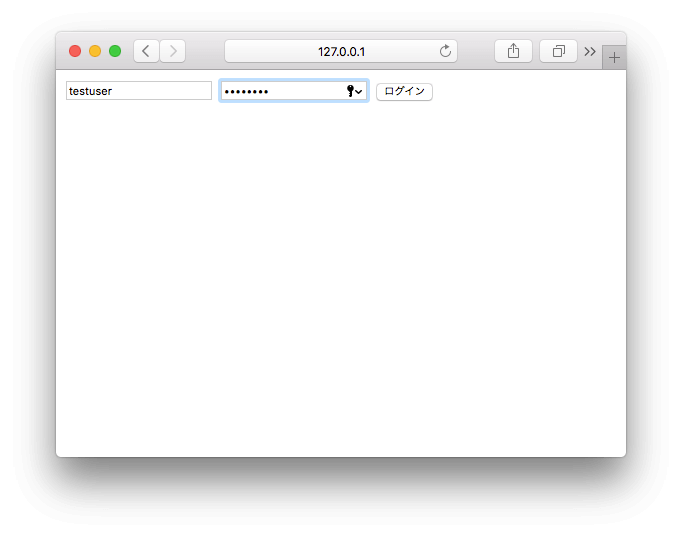
先ほど作成したユーザのユーザIDとパスワードを入力し、ログインボタンをクリックします。

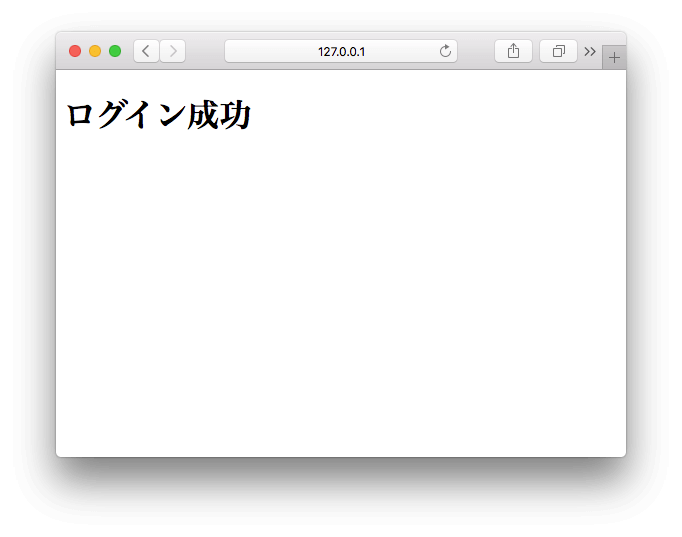
ログイン後の画面

ログイン成功と書かれたページが表示されればログイン成功です。
最後に
以上で Django でのログイン画面の作成は終了です。ログイン画面がないWebアプリケーションの開発はほとんどないと思いますので、この手順を覚えておけば、かなり手早くログイン画面の実装ができると思います。
まぁ、これ以外にもアプリケーションごとに urls.py を分割したり、テンプレートのhtmlファイルを整理したりなど、いろいろ開発初期でやらないといけないことはありますが、そのあたりの実装については、また次回にでも書いていきたいと思います。


コメント
[…] 12. [Django]ログイン認証できるようになるまで | CodeLab […]